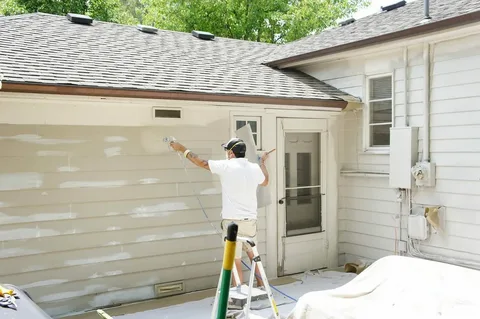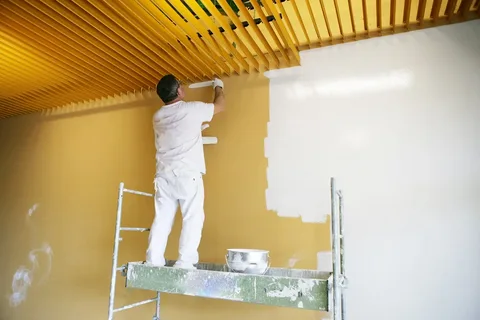
A fresh wall color can make a Bellevue room feel brighter, but it can also expose every dent, patch edge, roller ridge, and old repair that the previous finish helped hide. That is why Interior Painting should begin with the wall itself, not the paint can. Washington Custom Painting and Remodeling takes that view because a clean result depends on preparation, lighting, sheen, and how the room will be used after the crew leaves.
Bellevue homes create an interesting mix of conditions. Some properties have older drywall, repeated remodel patches, or dated textures, while newer homes often have tall ceilings, open layouts, and large windows that throw strong side light across long wall surfaces. Those differences change how much preparation is reasonable and what level of finish a homeowner should expect.
What a Professional Interior Repaint Really Includes
A professional repaint starts with a room-by-room assessment. Walls may have nail holes, anchor damage, hairline cracks, old picture locations, loose drywall paper, failed caulk, water stains, or patches that were never feathered smoothly. Ceilings, trim, doors, closets, built-ins, and accent walls should also be identified before pricing so the written scope is clear.
In Bellevue, we’ve noticed that most homeowners choose color before they think about surface condition. Once a room receives a uniform new coating, however, small defects can become easier to see because the eye is no longer distracted by faded paint or mismatched touch-ups. A wall that looks acceptable in a flat finish may show more texture under eggshell, especially when light runs across it rather than hitting it straight on.
Preparation can include cleaning, filling, sanding, spot priming, stain blocking, and caulking suitable trim joints. Repair material should match the defect. A shallow nail hole does not need the same treatment as torn drywall paper, a recurring crack, or a larger patch opened for plumbing work.
Homeowners comparing local room-painting estimates should ask what level of repair is included. A basic repaint is different from skim coating, texture correction, or Level 5 finishing. If the desired result is a nearly flawless wall under strong natural light, that expectation needs to be discussed before the estimate is accepted.
The Real Challenge Inside Bellevue Homes
Bellevue’s wet fall and winter climate does not mean indoor walls are automatically damp, but it makes moisture history worth checking in bathrooms, laundry rooms, basements, and areas near past plumbing leaks. New paint should never be used to conceal an active source of water. A stain can be sealed after the underlying issue is corrected, but coating over an unresolved leak only delays the next failure.
A client in Bellevue reached out after noticing a yellow-brown mark returning through a recently painted ceiling. The first repaint had covered the discoloration, but the stain came back because the old water mark had not been isolated with the right primer. After confirming there was no active leak, the affected area was prepared, sealed with a stain-blocking primer, and recoated. The important lesson was that another finish coat alone would not solve the problem.
One objection customers often raise is, “Why does prep cost so much when the walls already look pretty good?” The answer becomes obvious after the room is finished. Fresh paint creates a more consistent field of color, so raised patches, rough sanding, cracked caulk, and flashing around porous repairs can stand out more than they did before.
People searching Exterior painters near me should ask a question that many service pages leave vague: what defects will still be visible when the project is complete? Current Bellevue competitors already discuss patching, sanding, priming, drywall repair, smooth finishes, premium coatings, and protection of floors and furniture. Fewer pages explain the acceptance standard for an older wall or how lighting changes what “smooth” actually looks like.
That distinction matters in rooms with large windows, long sightlines, wall-washing fixtures, or lamps placed close to the surface. Side lighting can reveal small ridges that disappear under diffuse light. A useful pre-paint inspection should therefore look at repairs from several angles and, where practical, under both daylight and the room’s normal evening lighting.
How Washington Custom Painting and Remodeling Plans the Work
The approach starts by defining the finished result before masking begins. Walls, ceilings, trim, doors, closets, accent areas, and repair zones should be listed separately, along with the intended color and sheen for each surface. That makes it easier to distinguish ordinary prep from additional drywall or plaster correction.
Protection comes next. Floors need suitable coverings, furniture should be moved or wrapped as agreed, hardware and switch plates should be handled carefully, and sanding dust should be controlled. In occupied homes, room sequencing matters almost as much as brush technique. Completing one usable area before opening another can reduce disruption for families working, cooking, or sleeping in the house during the project.
Primer choice should follow the substrate. Bare drywall repairs may need sealing so they do not absorb finish paint differently from the surrounding wall. Water marks can require stain-blocking primer, while glossy existing coatings may need deglossing or sanding to improve adhesion. The goal is not to apply primer everywhere by habit; it is to use it where it solves a real surface problem.
Current Bellevue competitors also promote Level 4 and Level 5 finishing, texture matching, luxury-home work, and smooth surfaces under natural light. The useful gap for homeowners is knowing when that extra finish work is worth paying for. A low-sheen bedroom wall with ordinary daylight may not need the same correction standard as a long living-room wall beside floor-to-ceiling windows.
Anyone comparing higher-end painting proposals should ask who performs the final inspection and under what lighting. Cut lines, coverage, patched areas, trim transitions, and sheen consistency should be viewed after the coating has dried enough to judge properly. A quick walkthrough while surfaces are still wet can hide issues that become obvious later.
What to Know Before You Choose
Working with clients in Bellevue, our team found that homeowners compare estimates more accurately when the proposal separates painting from wall correction. Two contractors can quote the same rooms and still be pricing very different jobs. One may include only basic nail-hole filling, while another includes crack repair, texture blending, stain sealing, and extensive sanding.
Start by deciding what bothers you now. If the main goal is a color update, say so. If old patches, wavy walls, recurring cracks, or visible drywall seams are the reason for repainting, point them out during the estimate. The painter then has a fair chance to price the desired finish rather than guess.
Sheen should be chosen by room use and wall condition, not by a single rule for the entire house. Lower sheens can make minor texture variation less noticeable, while more washable finishes can make sense in hallways, kitchens, children’s rooms, and busy entry areas. Product lines differ, so ask how the recommended coating balances cleaning, appearance, and touch-up behavior.
If you are comparing the Best Interior painting company in Bellevue, WA , do not rely on photos alone. Washington Labor & Industries advises homeowners to verify contractor registration and confirm bonding and insurance before hiring; its Verify tool also provides information about contractor status and other records. A detailed written scope, change-order process, and cleanup plan are equally useful when deciding who will work inside your home.
Bellevue homeowners should also think about access. Condos, townhomes, narrow hallways, tall stairwells, and occupied rooms can affect equipment setup and work sequence. Discuss where materials will be stored, how daily cleanup works, and which rooms must remain available.
Color samples deserve more than a quick glance. Put larger samples on different walls and check them in morning light, cloudy daylight, and evening artificial light. Bellevue’s frequent overcast periods can make the same color feel cooler or flatter than it does under direct sun, while warm interior bulbs may shift it in the opposite direction.
One final tip is to ask what the painter would refuse to coat immediately. A thoughtful answer may include an active water stain, loose drywall paper, greasy kitchen residue, uncured patching compound, or a glossy surface that has not been prepared. Knowing when to stop and correct the substrate is a stronger sign of judgment than simply promising another coat.
Make the Finished Room Look Right in Real Life
A polished interior should hold up under normal daylight, evening lamps, cleaning, furniture placement, and everyday traffic rather than looking good only during the final walkthrough. Washington Custom Painting and Remodeling can assess painting needs in Bellevue, WA, with wall condition, sheen, repairs, protection, and occupied-home logistics considered before work starts. The most useful next step is to request a room-by-room scope that states exactly what will be repaired, protected, primed, and coated.
4. FAQs
How much does interior house painting cost in Bellevue?
Pricing depends on room size, ceiling height, wall condition, trim, repairs, paint grade, access, and the number of colors involved. A simple repaint costs less than rooms needing crack repair, stain sealing, or extensive sanding. Ask for walls, ceilings, trim, doors, and repair work to be itemized separately.
How long does it take to paint the inside of a house?
A single straightforward room may take a day or two, while several rooms or a whole home can take much longer. Drywall repairs, primer, detailed trim, occupied spaces, drying time, and major color changes all affect the schedule. A good proposal should explain the room sequence as well as the expected completion window.
How do I know an interior painter is legitimate in Bellevue?
Check the contractor’s Washington registration, bond, insurance, written proposal, recent project examples, and reviews that mention communication and cleanup. Ask who will be working inside the home and how changes are approved. A legitimate contractor should explain the scope, payment terms, materials, protection plan, and final walkthrough before work begins.
Should every wall be primed before repainting?
No. Sound walls with compatible existing paint may not need a full primer coat. Primer is more useful over bare drywall, repairs, stains, porous patches, major color changes, or surfaces where adhesion is uncertain. Spot priming can often solve isolated problems without adding an unnecessary full-wall primer step to every room.
Why do wall patches sometimes show after fresh paint?
Patches can flash because repaired areas absorb paint differently or because sanding left a raised edge that catches side light. Sheen can make the difference more obvious. Proper feathering, sealing porous repairs, and checking the wall from several angles before the finish coat can reduce visible patch outlines after painting.